Triumph t955i Valve Adjustment Tips & Tricks
Designed less to be a step-by-step instruction, this will hopefully give you a few tips and tricks to help you in your first valve adjustment on your modern triple, besides you should have the service manual for the finite details anyway.
Unfortunately, adjusting the valves on the Triumph triple motor is the most difficult valve adjustment I have ever done. I would daresay that the triple valves are a more involved process than adjusting 2V Ducati desmo’s. Yep, they’re that bad. Not that it’s a particularly difficult task, but it’s so bad because adjusting the quaint shim-over-buckets requires an uncanny number of additional steps in addition to the additional required ‘special tool’, that and the older sand-cast triple motors do not have a crank bolt that can be accessed, meaning that the engine needs to be turned over with the rear wheel.
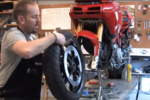
Everything needs to be taken out of the way. As with virtually every other maintenance item on the triple, the entire rear fender/seat cowl bodywork needs to be removed., including, the entire fuel tank.
Removing the tank is easier than one would imagine. Only three bolts hold the tank in place. Remove the two top-front mounts, then the single bottom rear bolt before you’ll reach the most treacherous part of the disassembly; disconnecting the infamous plastic fuel fittings. These brilliantly designed quick connects were ruined by the British bean counters who must have insisted that they were made with the cheapest, most brittle plastic known to man. One false move and these pressurized guys will shatter and spew gas everywhere. They are affected by a factory recall, but even the replacement items are plastic. So, it’s best to find a set of metal ones to take their place. 2001 and newer Daytona’s and 2002 and newer Speed Triples have aluminum fittings – but still, be careful. The aluminum fittings are known for damaging the o-ring that seals the fuel.
To ease removal of these fragile plastic fittings, I hosed; I mean hosed, ‘em down with penetrating oil and let them sit while I cleared a safe place to store the tank.
I also unplugged everything in the vicinity; including the fuel level sensor switch, shimmied the tank around so I could unplug all the vent hoses that attach to the tank. Once I got the fuel fittings disconnected I quickly got the tank out of the way. When you are ready to pop the fittings off, try to alleviate any tension on them. Press the metal tab towards the center of the fitting, and then gently start working the fitting straight out. Be very, very careful. Start with the bottom fitting because it’s easier to access, then remove the top fitting. The release tab on the upper fitting is located 180-degrees from where the bottom release tab is and is much more difficult to access. I can’t stress enough to be gentle and move slowly. Because of my paranoia, I was able to remove mine without a problem. I also replaced them with the metal fittings that are available through t595.net and Triumphrat.net.
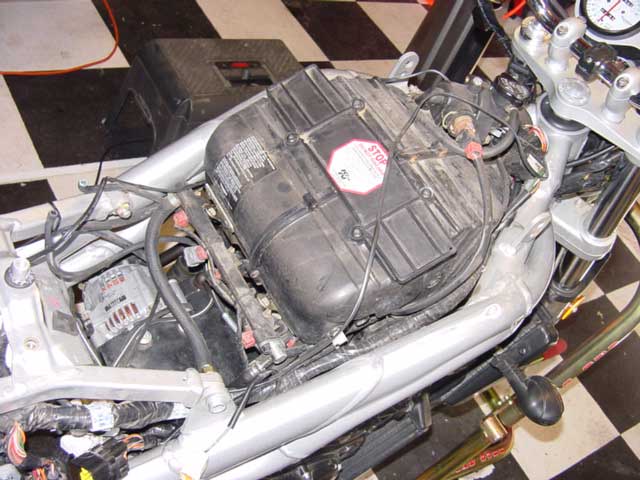
Next, you need to remove the airbox. The airbox on the Daytona is more difficult to deal with because the snorkels are longer. There’s is also a metal tab on the front of the valve cover that holds everything in place with two torx heads on the back of the airbox. The thermostat and radiator cap are affixed to the airbox as well. Remove the thremostat with a 10mm bolt and unthread the temperature sensor – unplugging the temperature sensor on the radiator cap requires breaking the plug, so it’s wisest to unthread it, but be careful no to damage the wires.
Springs, not clamps, hold the airbox to the intake manifold. It takes a fair amount of pressure to pop them off. But as with all things mechanical, start gently to prevent any breakage. A few pinch-style hose clamps are all that’s in the way to getting the airbox free and clear after the airbox manifolds come off the top of the throttle bodies.
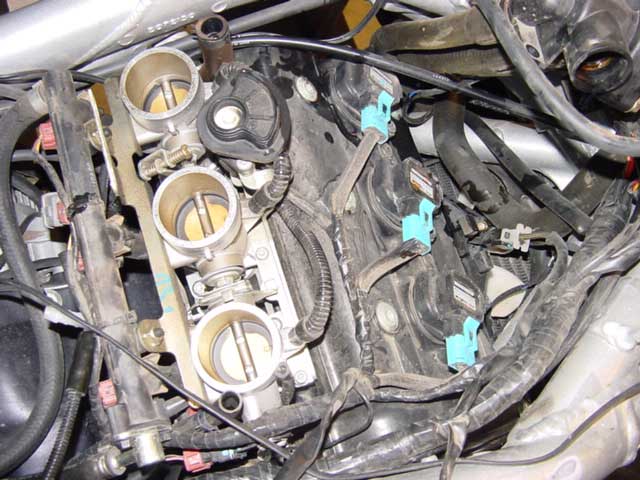
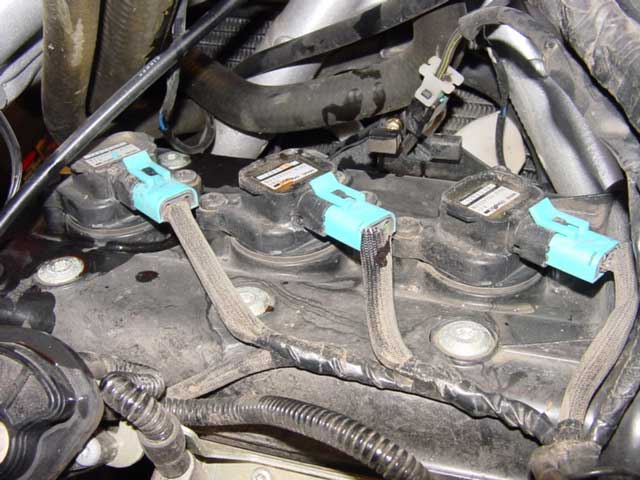
Once the airbox is stowed safely on the other side of the garage, the top of the motor should be exposed to the world. You’ll notice three funky looking things live where the spark plugs should be. These are the coils. One coil for each cylinder (compared to one coil for 8-cylinders on American cars). Be careful unplugging the blue plugs that go into the coils. Once the plug is compromised, they have been known to unplug themselves at the most inappropriate times. Mike discovered this the hard way and ended up zip tying the plugs back to the coils. Once unplugged, remove the two torx heads for each coil and carefully remove the coil.
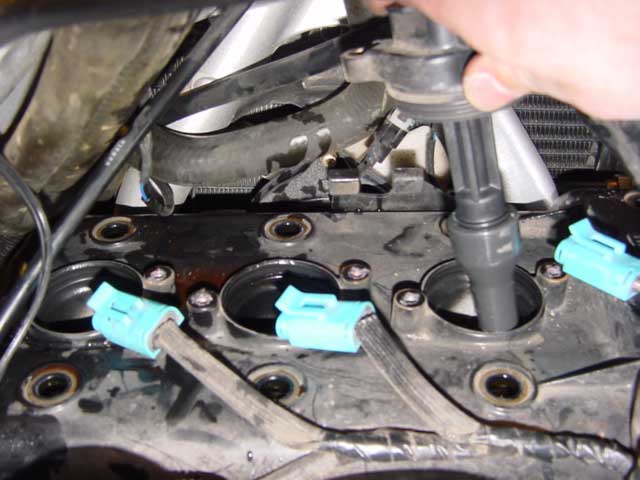
Pulling the spark-plugs is also a bear. Because they are buried so deep below the valve train, getting clean leverage on the plugs is difficult, but it’s straightforward. (I always install fresh spark-plugs when I adjust the valves).
Next, remove the six valve cover bolts. The two on the left side of the bike are longer so be aware before you just throw all the bolts into a coffee can. When the bolts are removed, be prepared that the valve cover will be difficult to remove. I always use my trusty sand hammer (loaded hammer) in these situations. A few solid hits with a loaded hammer are usually all that needed to free the cover. Once free, snaking it out of the way is the next challenge. Be very careful of the valve cover gasket. It’s attached at the three spark plug openings but will fall out of place around the perimeter of the cover. Impatience could result in tearing the gasket, and valve cover gaskets can normally be used two or three times before requiring replacement.

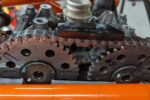
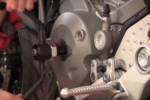
Now the fun part begins. Look deep into the top of your motor, you should be able to see the two cams, exhaust and intake, as well as the shims themselves as they sit directly on top of the valve stem. To rotate the motor, put the bike in sixth gear. The manual says to rotate the wheel with just the tire, but I found this to be too clumsy and imprecise. Instead, I used my 46mm socket on the rear wheel axle and rotated the engine with my long breaker bar. I inspected the clearance of all my valves and found everyone to be tight at the first scheduled adjustment. One valve was so tight that I could not even measure it with my smallest shim, .003 mm.
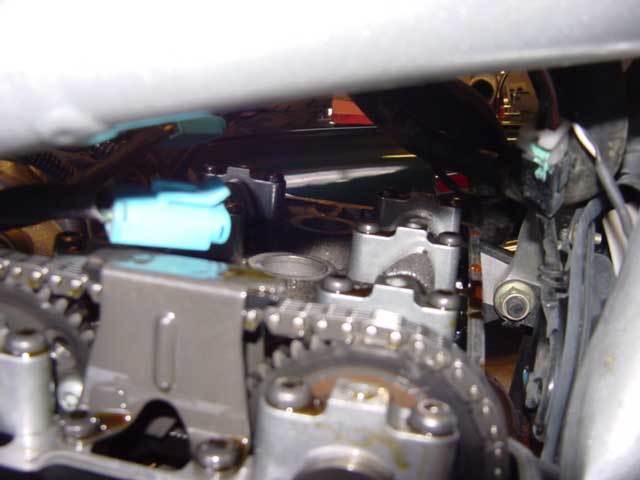
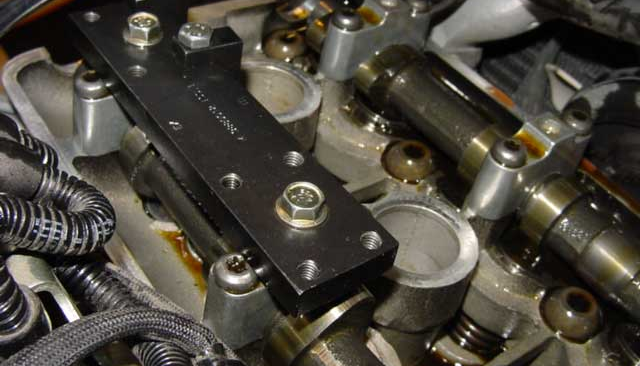
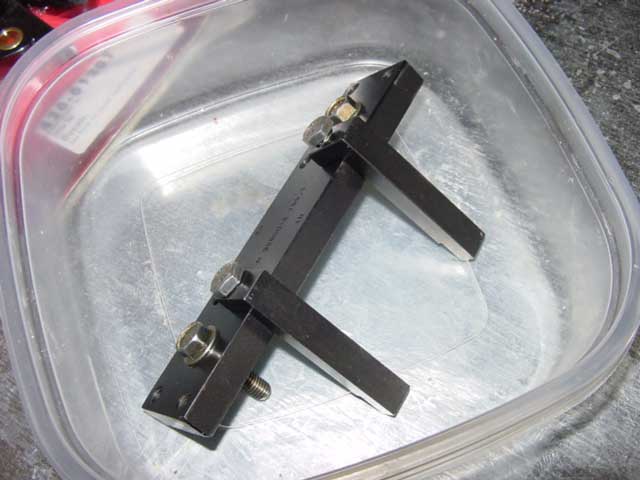
Take the special tool and, it should have slight stamps indicating how it needs to be installed. One way for the intake valve and the opposite for exhaust valves. Be careful as the cam can only rotate so far with the tool in place, if you try to rotate the cam beyond that point, the cam lobe will impact the special tool and most likely cause damage to the delicate cam.
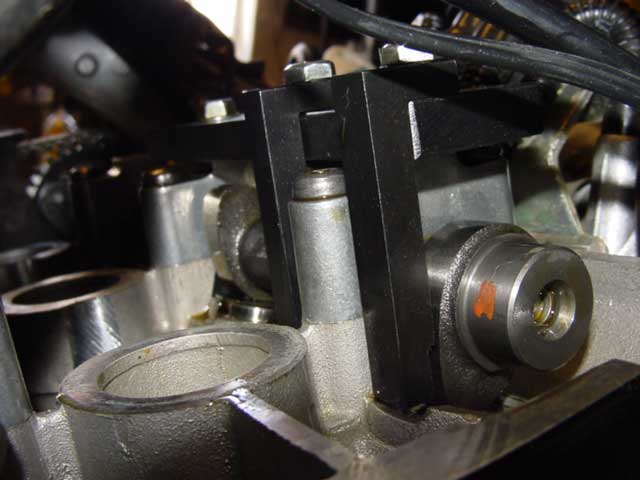
Before you install the special tool, make sure the bucket is rotated to the proper position. Install the special tool with the cam lobe pointing straight down, opening the valve, then rotate the cam, either by turning the engine forward or backward until the cam is facing up. The valve is held open by the special tool and there should be a fair bit of clearance between the shim and the cam. This was not mentioned in the service manual, but the bucket, the part that holds the shim in place, has a notch in it. This notch needs to be lined up with a subtle notch in the engine casing. (in the picture above)
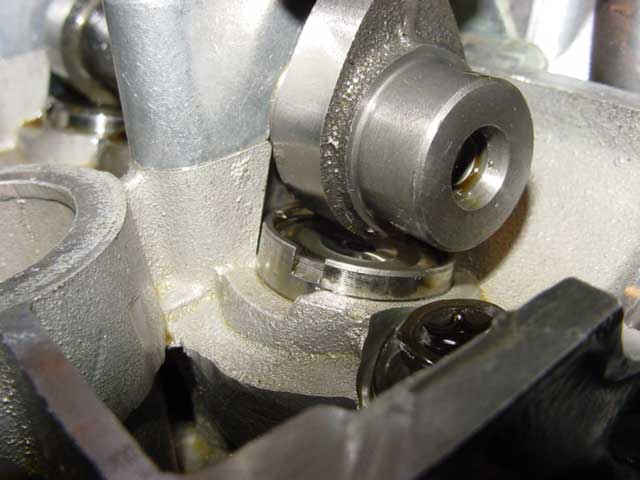
Once the tool is in place and the notches lined up and the cam lobe pointing up and the valve held open by the special too, you can try to remove the shim. It has to be pried out and grabbed at the same time. I ended up using a small metal awl that I happened to have, in conjunction with a telescoping magnet that I broke for the job. In its original form, the magnet tool was too long. Once I broke my magnet tool, I could get it to fit in the confined space.
Avoid the temptation to get frustrated, this process requires a delicate hand. If you use the awl to get underneath the shim, you should be able to pop it up – the shim will be held down by suction caused by oil. When the shim lets go, it could pop up. Use the magnet to keep the shim from getting out of hand and possibly dropping down into the motor.
The first shim will be the most difficult, but they will get easier. With conventional shim under bucket systems, you can remove all the shims at one time and swap them around. But with the shim over bucket systems, each shim needs to be measured, removed and replaced, one at a time. You cannot turn the cam without a shim in place. The edges of the empty bucket and the valve retainer will damage the delicate cam lobes. This is why the job is so time intensive. The time it takes to install the tool, remove the shim, replace the shim is about 15 unique steps for each shim. While most motorcycle shops allow you to swap shims with no real cost, the Triumph design makes this difficult. You will be able to move some shims from valve to valve. If you are lucky, you’ll likely only need five or six of the 12 shims. My advice would be to measure each shim, replace it, then compile a list of the sizes you need and move shims around accordingly before treking to your nearest dealership to swap out for the remaining shims.
One thing that was learned in this process was that the Triumphs tend to have soft valve seats. This may be the biggest flaw in the Triumph triple motor. According to some of our very credible sources, all Triumph triples tend to have very tight valves every 12k miles. Because of this information, we suggest that Triumph valve adjustment intervals be reduced to 10k miles. We’ll be adjusting ours every winter, regardless of mileage. Additionally, in order to speed up the valve to adjust the process, we may attempt cam removal for the next adjustment.