How to Install Motorcycle Internal Heated Grips
There are several options for heated grips. Three come immediately to mind. Undergrip (read how to install this style of heated grips); the kind where you wrap some heating elements beneath the rubber handgrips. Overgrip; the kind Kris and I have been using for the past year where a bulky heated fabric wraps around the outside of the handgrips. And the grips themselves; a style where the heating elements are built into the rubber of the handgrip.
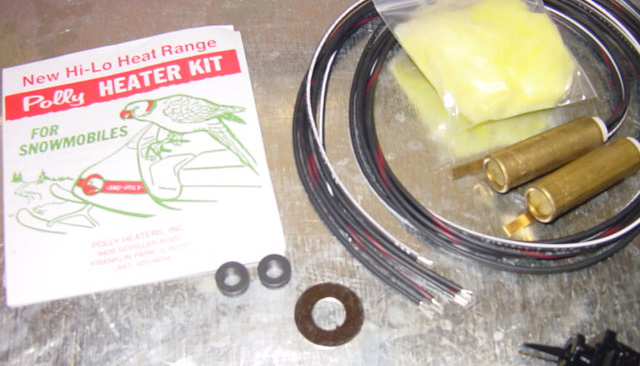
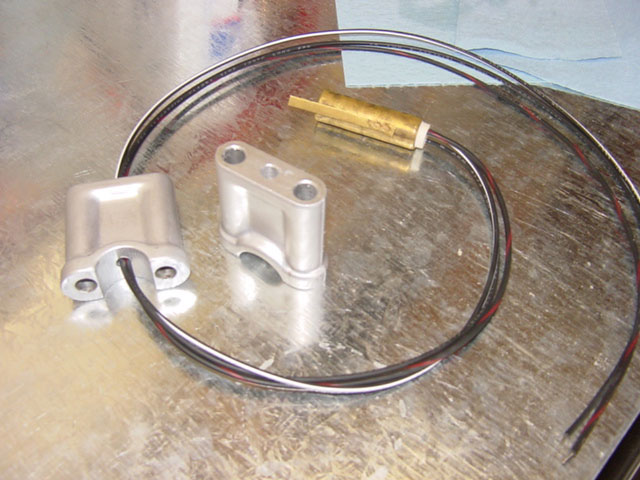
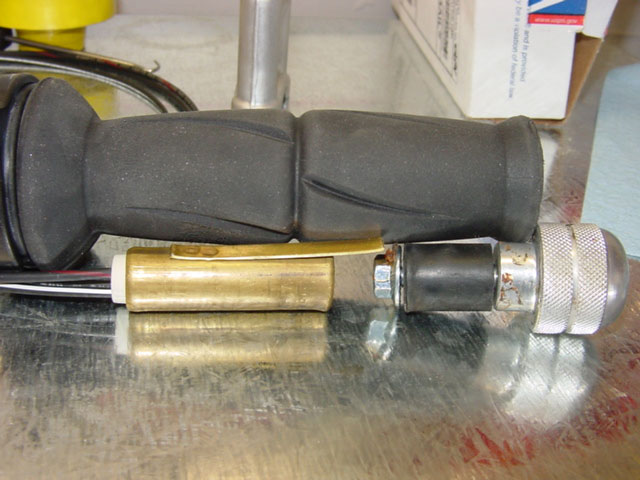
We had never heard of, nor thought of, Snowmobile heated grips. This style features two metal plugs that reside inside the metal handlebar itself. The advantage of this system is that no wires are exposed – and on motorcycles with a twist throttle no exposed wires means that the wires and connectors are not subjected to continuous movement.
Tim, at Wrights Motorcycle Supply, suggested we give these a shot. The brand, Polly Heat Warmers, looks like they’ve been in business for quite some time based on the 1970’s packaging.
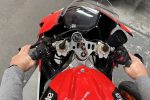
To make the grips look OEM installed, we wanted to make every effort to hide as much of the installation as possible. Starting out with an M900 Ducati Monster we decided to dive in. These heated grips will have compromised performance if installed inside an aluminum bar and depending on which bar you have, they may not even fit inside the aluminum bar.
We can only recommend the Polly’s if you have a steel handlebar. If you have an aluminum bar, check out the alternative “wrap-around” heated grips.
We strongly recommend this mod to be done alongside with our Relay/Distribution Block mod. This helps prevent accidental battery discharge should you forget to turn off the grips when you park your motorcycle.
Parts & Supplies
- Mini 3-Pole Toggle Switch.
- Polly Internal Motorcycle Grip Warmer Kit.
- Red 18guage Wire
- Black 18gauge Wire
- White 18gauge Wire
- Small Zip Ties
- Electrical Tape
- Heat Shrink Kit
- Liquid Tape
Recommended Tools
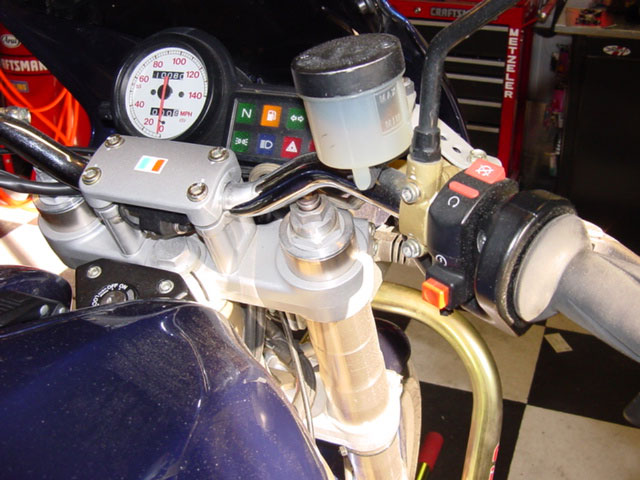
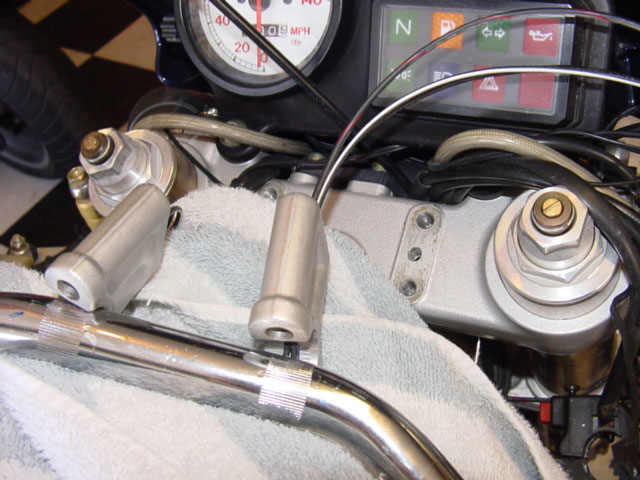
We started by removing the handlebars and the dog bones/risers to see what we had to work with. We were expecting a conventional bolt-through setup, but the Ducati was actually easier to work with, even though it would require more precision.
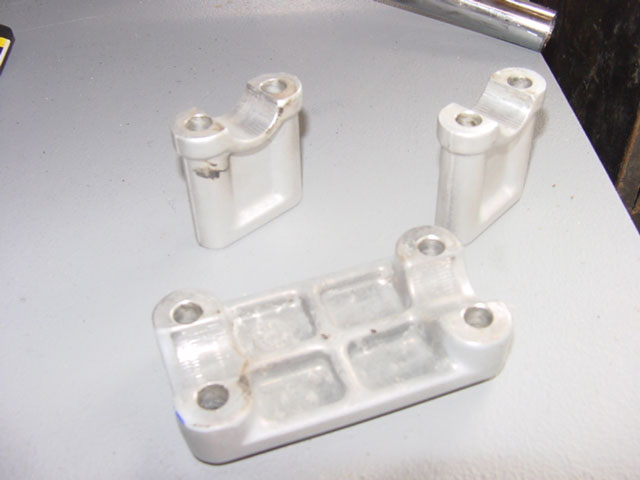
Our biggest concern was drilling down the center of the risers. Too far to the left or the right and We’d end up with some really ugly aluminum.
After carefully drilling down the center of the risers, with the smallest drill bit that would allow the wires to pass through, we were ready to move on to the next steps.
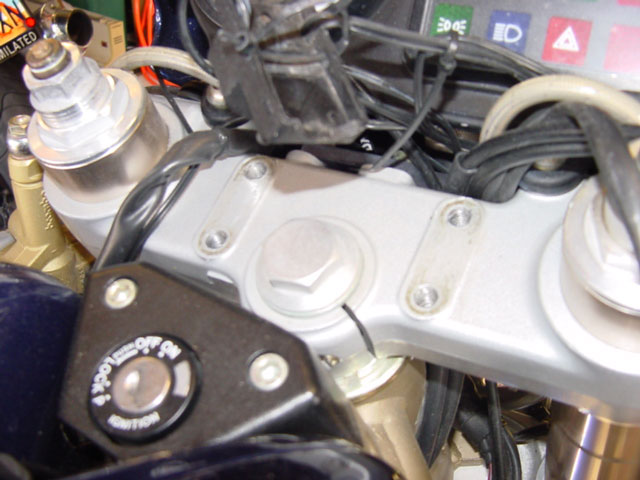
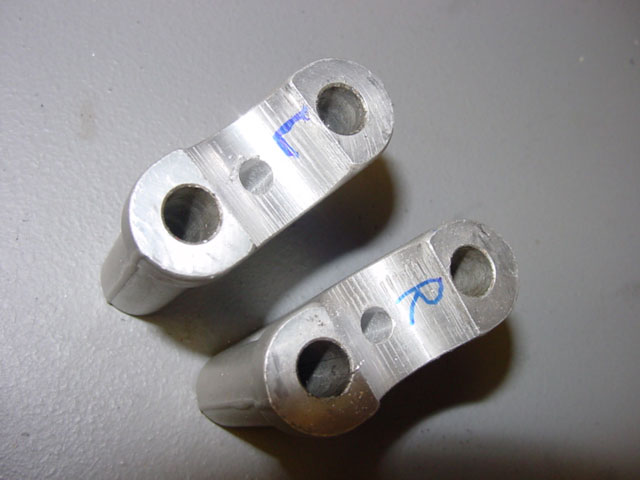
Next, we drilled the triple-clamp. Initially, we were going to remove the clamp to drill it on the press but then we thought duh, why not just use the risers like a template.
Which is what I did. Bolting the risers back to the triple-clamp we were able to start the hole in the exact right place with just a hand drill. However, it was critical to make sure the risers were labeled so the holes matched up correctly.

We were using such a small hole for the wires to pass through that even a millimeter offset could pinch the wires and tear the insulation.

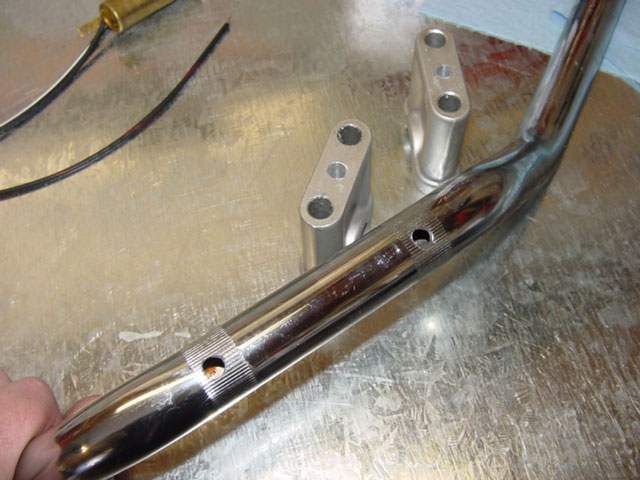
Using the same method we used for the triple-clamp, we drilled the handlebar. This proved to be quite a bit harder because everything kept moving around.
We had to make sure we held the risers in the exact right place otherwise the preferred handlebar position would be tweaked or the two holes would be offset from each other. We marked the handlebar position with a sharpie before removing it so there were some reference marks. We ovalized the holes to allow for some adjustment of the handlebars, being careful not to make the holes too large and compromise the strength of the bars. Aluminum bars are thicker and will require additional modification to get the grips to fit inside.
Pulling the wires through the bars proved to be much more difficult than expected.
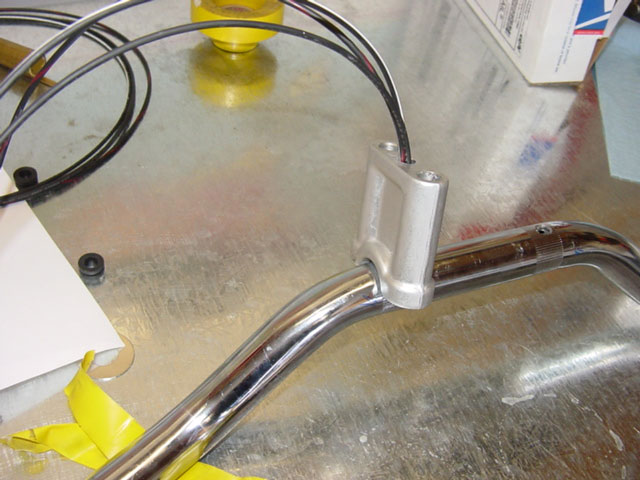
It took a fair amount of time and quite a bit of patience to slowly grab the wires with some tiny hooks and awls.

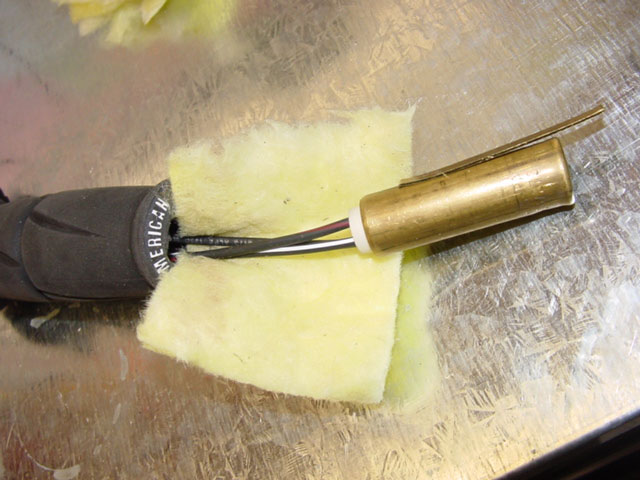
All along we were worried about having enough room for the bar-end weights or bar-end mirrors. Fortunately, the plugs are small enough to allow for plenty of room for both and allowing for optimum placement of the heating element, which would be closer to the inside of the hand position.
Cleverly, the kit comes with some fiberglass insulation that goes into the bar before the heating element. This prevents the element from moving and keeps the heat where your hands will be.
Putting everything into place proved to be the most difficult part of the task. Moving everything in unison without pinching wires was tedious and difficult. Every slip meant starting over again. A simpler installation would have prevented this part of the installation, but a job worth doing…
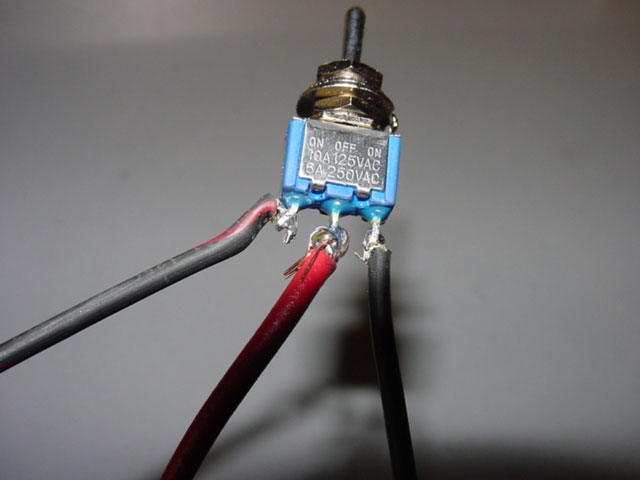
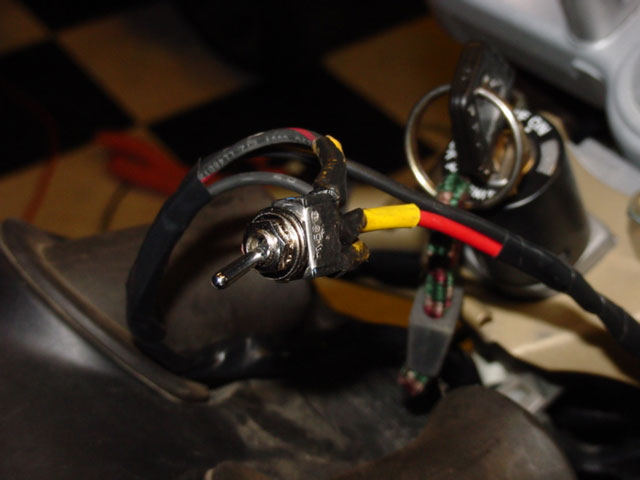
The gargantuan switch that came with the kit is really ugly so we replaced it with a much smaller switch with the exact same specifications.
The wiring diagram in the package is somewhat cryptic. The wire with the red line is “high” the all black wire is”low” and the wire with the white line is the ground. You’ll need to provide your own red wire to run to a positive lead.
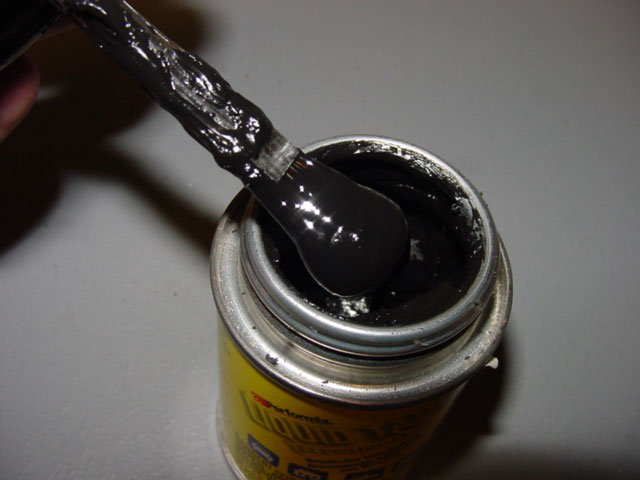
Solder everything. We’ve had too many bad things happen with solderless clips. We also used liberal amounts of liquid tape and shrink tubing. The liquid tape is a nasty black goop that you brush onto an exposed connection and it dries to a black rubber. Use the liquid tape to weatherproof the switch as much as possible.
Twist and tape the wires to make them look a bit neater and if you look close you can see the liquid tape “weatherproofing” on the switch. Used some heat shield/shrink tubing around the leads of the switch to ensure there will be no accidental shorting.
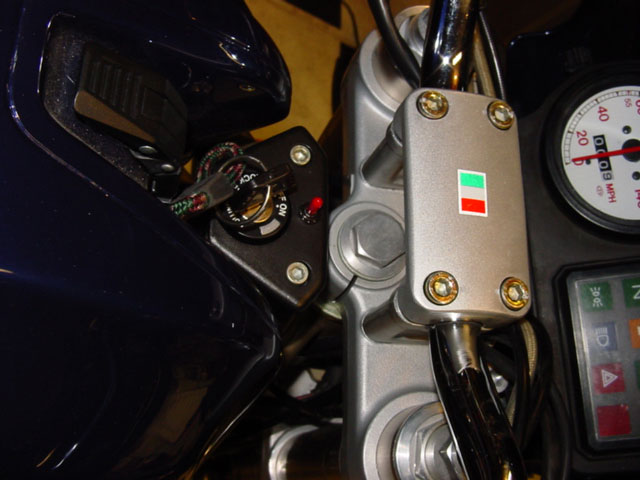
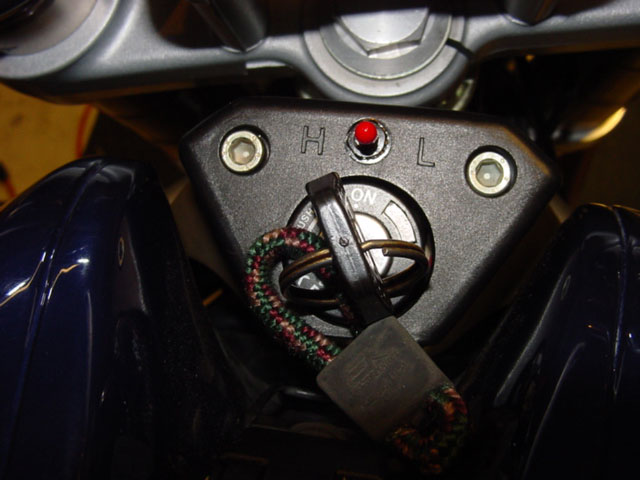
Another quick trip to the drill press and we were able to make for a very tidy switch location. We used a little bit of flat-black model paint to mask the silver bolts and washers holding the switch in place. The switch also came with four rubber boots that cover the dongle of the switch to keep out moisture and make the dongle easier to handle with gloved fingers. The covers come in white, yellow, green and red. It’s a Ducati, so we had to choose red. We do wish there’d have been a black option. That would have been stealth.

The switch position will be opposite of the wire locations. If the wire attaches to the left lead of the switch, high will be active when the dongle is moved to the right. I also used some black vinyl lettering to mark the high/low positions, adding that last little touch. Wire the switch up to a relay, so that when the key goes off, the grips turn off as well. This will prevent accidental battery death by a forgetful pilot or meddling passer-by.
NOTE: A relay/distribution-block allows the rider to hook up multiple items at one place and have the all the accessories turn off with the key. A relay/distribution block typically runs directly off the battery with the relay getting its power from a running light or other switched source. Because the relay has virtually no draw, there is very little risk of overwhelming fuses. And because the distribution block and all the accessories get their power directly from the battery there is very little chance for damage to other electrical components.
Also, most bikes generate far more electricity than the bike needs; enough to have the ability to run two heated vests and a set of heated grips without putting any undue strain on the electrical system. However, every bike is different and you should check to be sure your bike can handle the added electrical workload. We’ve yet to find any bike that did not have a strong enough system to handle heated grips.
The grips put out an astonishing amount of heat but does take a bit longer to warm up the metal handlebar and the rubber grip. The grips put out so much heat that even with the bike just idling in the high position it was almost too hot to touch with bare hands. With gloves on and exposed to cold temperatures, the heat is dampened a bit, but the in-grip heaters work so well that we found we rarely used the grips in the high position. For almost every situation the low setting was just about perfect. Another benefit of the in-bar heaters, as opposed to the under grip heaters, is that while they take longer to warm up, once warm they stay warm for longer. They also produce a more consistent heat between the thicker throttle hand and the less bulky left hand.