How To Wash and Detail Your Motorcycle
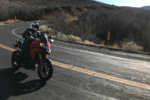
One of the very first times Mike came over to the house, his bike was astonishingly filthy. The paint looked okay, but the rest of the bike was downright grungy. When I offered to help him clean it with all the supplies I had on hand, he said okay, but as soon as I pulled out the garden hose he freaked out. “You’re not going to put water on it, are you?” He asked in dismay. Trying not to laugh, I say, “Mike, its a bike from England if any bike can handle some water, this one can.”. But it got me thinking, maybe some washing tips would be in order.
So, why have a clean bike? First, clean is pretty. How many of us would pay extra to buy the dirty bike in the back corner of the dealer’s lot? I dare say none. As motorcyclists, we are very proud of our bikes. We tend to be much more particular than the average car owner. That’s why there seems to be so many ratty, filthy cars on the road when so many more bikes look pretty good. A clean bike is less likely to get scratched because there are no abrasive materials on the paint to get scraped into the surface when touched. A clean bike will fetch a much higher resale value than a dirty one, and it has been found that clean bikes (and cars) are more likely to be left alone in parking lots.
Another advantage of clean is safety. A good detail job will give a lot of information on the condition of the bike. The World SuperBike pit crews and the MotoGP crews are known to wash and wax bikes before a race. Not only to look pretty for the cameras but rubbing one’s hands all over a bike and cleaning everything gets the pit crews down close with the bike, allowing them to see any flaws or missed or missing fasteners. It’s not unusual to find a loose fastener or a cracked bracket when cleaning your bike, allowing you to fix the problem long before it becomes problematic.
The Sun is your Enemy
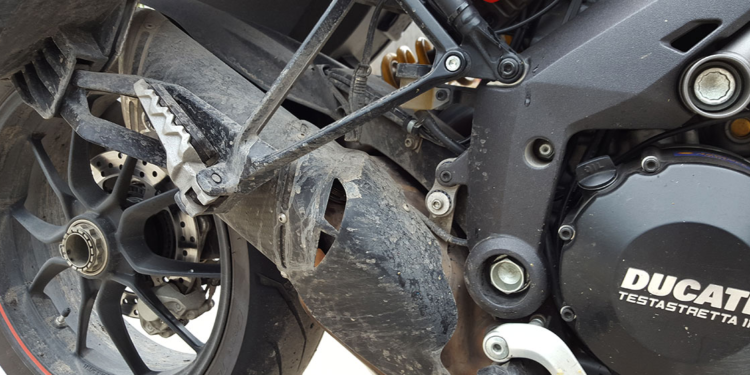
When you are ready to wash the bike make sure you park in the shade and out of the sun! Sun is the enemy when trying to clean. Soap under the heat of the sun will streak paint. Avoid the temptation to start cleaning with the tank, or the most visible part of the bike. A good detail job starts with the dirtiest parts, and honestly, that’s probably not your tank. The dirtiest parts are probably down low. What will work to clean all the road grime and oily residue all over the bottom of the bike? A couple of products work really well.
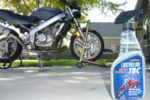
Believe it or not Kerosene does a good job of softening grease and oils and releasing them from your bike. This stuff works awesome on getting all that chain lube that is splattered all over your rear wheel. Kerosene is also what the guys who make chains say you should use when cleaning a chain and it does a great job removing chain fling from wheels (and other places) too. Be careful with Tar and Bug remover. It can take unsealed paint off.
We like to put Kerosene into a heavy-duty spray bottle to help with application, focusing the product where it will do the most good. The cheap-spray bottles; the spay nozzle just doesn’t hold up. But the heavy-duty ones last a good long while.
Another great product is Simple Green or Purple Power. Simple Green or Purple Power are non-petroleum based degreasers that are biodegradable. They dilute nicely in water and are gentle enough for painted surfaces. It cuts through brake dust, road tar and bug juice. It seems to clean best at a 50/50 mix diluted with water, which is a bonus. A bottle will last twice as long.
The problem with more powerful degreasers is that they can be too harsh. They can soak their way into gasket materials eventually eating them. Then you wonder why does my bike have all these leaks?Simple Green and Purple Power shouldn’t do that to you, but still be careful and think about where you are spraying any harsh cleaner. And for the sake of us all, read the back of the bottle first!
Round Up All Your Gear
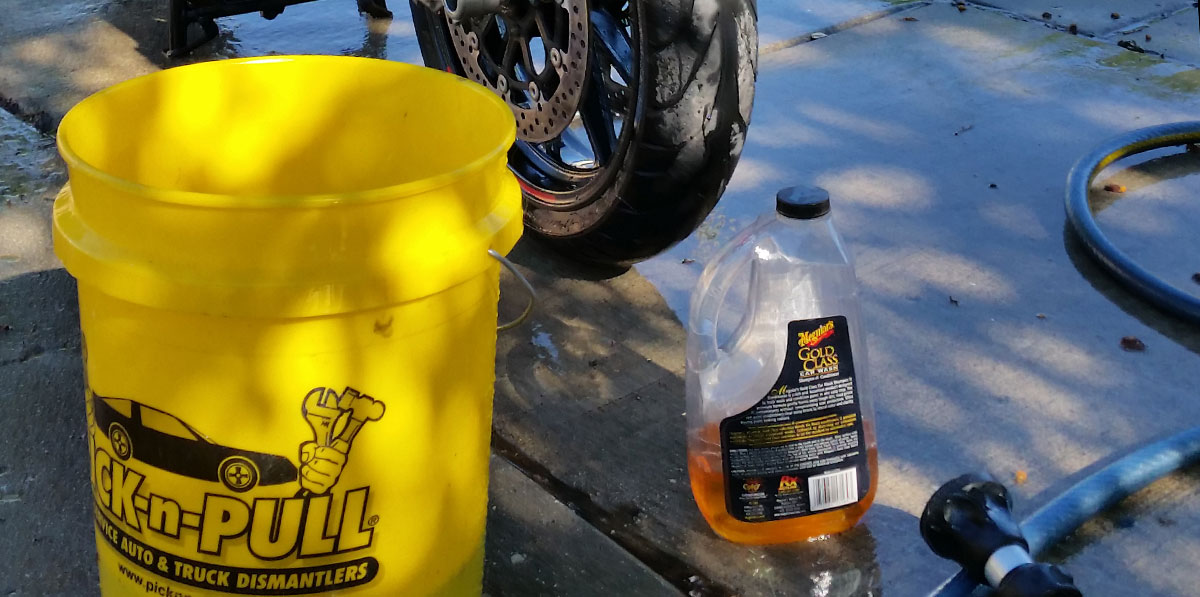
Its usually a good idea to have all of your cleaning stuff in one place. Keeping it together will make the bike washing process go faster. The items I use most frequently are:
- Chamois
- Bucket
- Wash Mitt or Washcloth (s)
- Brushes
- Degreaser
- Garden Hose with Sprayer
- Wax
- Detailing Polish
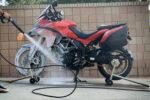
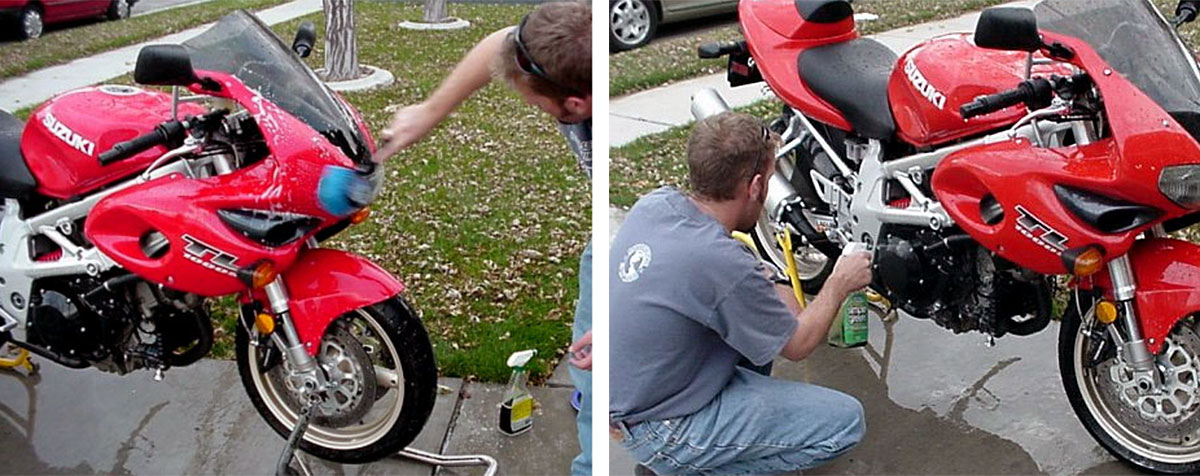
Before you do anything else, get out the garden hose and a sprayer and hose the bike down. We’ve found the rubberized “fireman” style nozzles work the best and last the longest. Plus the rubberized nozzle has saved us from more than one accidental ding and scratch. Avoid taking the bike to a high-pressure car wash as the spray can penetrate into all sorts of nooks and crannies on your bike, like wheel bearings, gas tank seams and electrical components, and eventually destroy those components as the water corrodes them from the inside out. Never use anything more high pressure than your garden hose to clean you beloved bike. But even with your garden hose sprayer avoid directly spraying delicate bits like the meters, gas cap, throttle-bodies or any seals.
Spray from the Bottom to the Top!
When spraying, start spraying at the bottom and work your way up. That way when you knock bugs, grit and other contaminants off your bike they will slide down the bike using the water as a lubricant. Once the bike is thoroughly wet and drippy, take the Simple Green, (or other like product) and spray it onto the really nasty parts of your bike. The wheel rims, the sprockets, the disk calipers; wherever the engine is exposed I spray down the engine and all of its nooks and crannies as well.
Nooks and Crannies
Now, while that grease and grime is soaking up the degreaser, take out your brushes (in varying degrees of firmness) and get ready to attack the nastyness. I tend to mostly use my wheel brush, tire brush, and toothbrush for the manky parts. People laugh about the toothbrush, but it tends to actually be the fastest way to clean all the small places on the bike.
Use a firm brush, like a grunge brush, or a rag with lots of water and kerosene to clean chains, sprockets or chain fling. Depending on how dirty, I’ll use the kerosene on many places of the motor where grime collects. For softer or more delicate porous finishes like the frame, rear fender, engine cases or plastic, fork legs, brake calipers I tend to favor the gentle degreasers like Simple Green or Purple Power. Be sure to use lots of water and be gentle. In many cases, just letting a stubborn bug or shmutz soak is enough to get it to release without undue scrubbing. As long as you use plenty of low-pressure water, and enough gentle cleaner you shouldn’t scratch anything, but you should test first before you dive in.
Brushes We Love
Depressingly, I’ve found that the good ol’ fashioned toothbrush has become an invaluable cleaning partner. In fact, I use two for most clean up jobs. They allow scrubbing access to many small, or tucked away bits of the bike, like the brake calipers themselves, or all the air-cooled fins on a Ducati or Harley. Using the smaller brush on the motor, and the other tight spots is actually quicker than trying to use a rag or a larger brush. Plus the bristles of your average toothbrush are about perfect for cleaning – firm enough to scrub, but not so firm as to scratch.
The more you clean, the more gunk gets rinsed away. It’s amazing how much black brake dust leaks out of calipers and the cleaned result is impressive. Use the stiffer brushes for metal bits, then move to the softer bristled brushes for your turn signals, mirrors, headlight, license plate, and even your seat. Most car-wash brushes that are even safe for your paint, as long as you are using lots of water, but we find ourselves gravitating towards the car-wash sponges. Wheel rim brushes are great for cleaning more stubborn gunk on more resilient surfaces, like brake rotors, exhaust pipes, wheels, and tire-sidewalls (yes, I clean those too).
Clean The Tools Too
While cleaning along, stop periodically and spray out the brush so you don’t drag more rubbish onto your bike as you clean. Pay extra attention to leading edges of the bike, including the levers, mirrors and switchgear – anything that faces forward will have more bugs and grime. Don’t forget to clean the undersides of things, like the undersides of your turn signals, mirrors and even the underside of your swingarm. Just because you don’t see these parts, doesn’t mean they don’t get dirty. The devil is in the details. Also, please don’t forget to wash your license plate. Just because you are required to put this on your bike doesn’t mean it doesn’t get dirty.
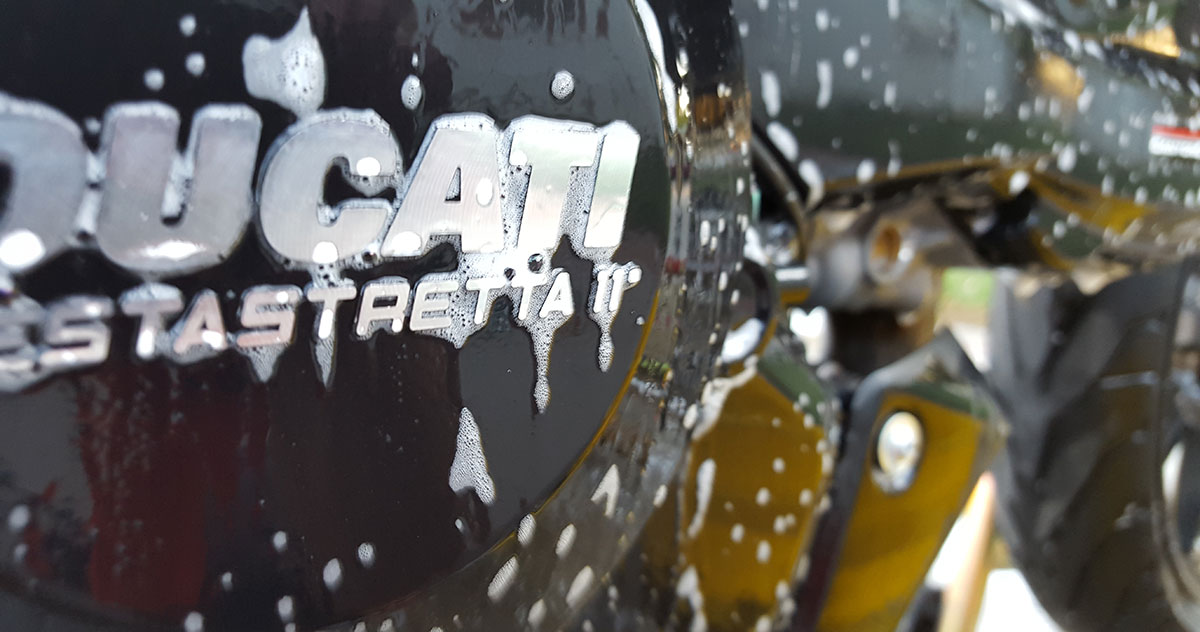
Once you are satisfied rinse everything thoroughly and go get a bottle of soap and a clean bucket. While its popular to use dish-soap for vehicle cleaning, vehicle specific cleaners are designed to be gentle on clear coats. Look at the back to determine how much soap to put in. Usually a cap-full is plenty. Another tip; If it is cold outside, fill the bucket with hot water… very nice!
Make sure your bike is good and wet, then start washing the most delicate parts first, usually starting at the top, working down. I start with the windscreen, then the tank… To help prevent scratches I even go as far as using different rags/sponges. Use one for lower parts and one for delicate and painted parts. If you start with greasy parts first then go to your windscreen you run the risk of scratching things. Be sure to scrub the underside and backside of your exhaust cans. Again, a lot of grime collects there.
After everything is soaped up, rinse it clean and do a quick inspection to make sure you got it all the soap rinsed off. If your bike is pretty grubby, go over it again with fresh soap and water. When satisfied, rinse thoroughly. (lather, rinse, repeat as needed). The more you rinse the less likely you’ll be to have soap spots. Make sure you get all the soap and degreaser off the bike before you move on because the next step is one of the most important. You have to dry the bike.
If you let the bike drip dry, it will end up with lots of water spots and streaks. Get a nice chamois (synthetic or leather). Soak the chamois with clean water, ring it out, then wipe it across the whole bike, starting with the delicate parts first, ringing it out frequently. The chamois will pull off all the water and actually clean out the pores even more leaving you with a very clean surface. If no chamois is available, a clean terry-cloth or used t-shirt or microfiber rag will also do a good job. It’s amazing how much more grime a chamois will pull off a clean bike even after you have soaped and scrubbed the bike. I have two chamois in this case too. One for paint, and one that gets used on the engine, wheels and other, more traditionally dirty parts.
Once the bike is dry you can move on to the wax or a quick detailer. I don’t wax every time I wash because of the amount of buildup that can occur. I will usually only wax two or three times a year or before long trips. If you are careful with your wax application, buffing will be a lot quicker. Try not to rub wax onto your seat, its a bugger to clean off. A little bit of blue-painters tape is great for keeping wax from getting onto seats, or textured plastic trim pieces. Avoid buying cheap, off-brand waxes. Many of them contain chemicals that can do long-term damage to your paint. I prefer to stick with well-respected brands like Meguires.
When waxing, make sure that your applicator is clean; you really would hate to be dragging a pebble or flake of metal stuck in the pores of the sponge all over your pretty paint. Contrary to popular belief, circles are not the best way to apply wax. Applying wax in circles results in spider webbing. Also, paint is not applied to the raw metal in circles; it is applied in straight lines. So, when you apply your wax, apply it in straight lines. Allow the wax to dry before you buff it out with another clean cloth, microfiber is our first choice. Again, buff the paint in straight lines, the same direction that you applied the wax. Turn the rag frequently to prevent re-applying wax back onto the bike. If you take your time during the buffing process you will end up with a much deeper shine and less missed spots of wax all over the bike and less waxy powder left over on the paint. I usually go through two or three rags buffing. A clean rag goes a long way and I find the buffing to be the most rewarding part of the cleaning process.
If wax isn’t needed, you can always go with a quick detailer. One of the professionals top secret weapons that they don’t want you to know about is Pledge. Pledge is one of the best quick detailers available on the market! It offers some of the best long term protection, will give your bike a wet luster, it fills light scratches and scuffs, repels dust, makes it easy to get off bugs, makes the bike easier to clean the next time and gives your bike that lemony fresh scent! (But it also comes in a variety of other scents!). It’s also awesome on your fork tubes to prevent bugs from sticking and making the tubes more slippery for better suspension performance.
As far as long term effects of Pledge, they are substantial. I met a guy who owned a 1978 Gold Wing that still had the original paint, with the original warning stickers. He used Pledge religiously and it looked amazing. The Pledge had done a heroic job of protecting the paint and keeping it looking good for over 20 years. The only problem with Pledge is if you use it a lot it will build up and look smudgy, but it does come right off with a good washing. Pledge also does a fantastic job on gauges, turn signals, mirrors, and every other piece of plastic on your bike. Just keep it away from the seat because it is slippery. I personally rotate between products, wax, pledge and a quick detailer depending on how dirty the bike is. If there’s only a light smattering of dust on the bike, a quick detailer works best.
Polishes We Love
- Meguires Ultimate Carnuba Wax
- “Honda Polish” Quick Detailer
- Mequires Ultimate Quick Detailer
- Pledge
- Meguires Ultimate Black Plastic Restorer
- Mircofiber Cloth
Finally, is your windscreen. Carnuba wax and a soft cloth will keep it nice, but another fantastic product we can’t live without is called “Plexus.” It was orignally designed to clean canopy’s on fighter jets. But it’s brilliant on windscreens (and on your helmets visor as well). The stuff is a bit spendy, but totally worth the investment. A can of Plexus usually lasts us a year or so. You don’t need much of it, and you only use it on a small area.
Just remember to never clean your windscreen (or your helmet visor) using circles. Always use a side-to-side motion, and always the same motion. So if you clean and polish from left to right, always clean/wax/polish from left to right and only clean from left to right. If you only work top to bottom, always work top to bottom. This prevents “spider-webbing” and will make your visor/windscreen look better for longer.
However, one thing that is critical to remember is that ArmorAll is bad. Specifically on motorcycle tires. Some sources claim that Armor All can be used on the sidewalls of a motorcycle tire and not on the tread. However, these claims are false! I contacted two tire manufactures to find the answer to this question. Both of them said Armor All will leach moisture from the tire and will void any warranty.
In any case, keeping your bike clean is fun, and helps you to enjoy riding that much more. Having a clean bike is reminiscent of how it felt that first day you rode it home. You’ll likely find a new level of pride for your bike. (Not to mention you just might notice that you forgot to tighten your caliper bolts last time you changed your tire.)