LED is all rage these days, but there is an obscure law that requires all motorcycles imported to the US to have incandescent rear turn-signals. Yes, it’s a ridiculous law, particularly with LED signals being brighter and less susceptible to damage from vibration.
There are scads of LED turn signal options to choose from. So many that it’s hard to choose the perfect set.
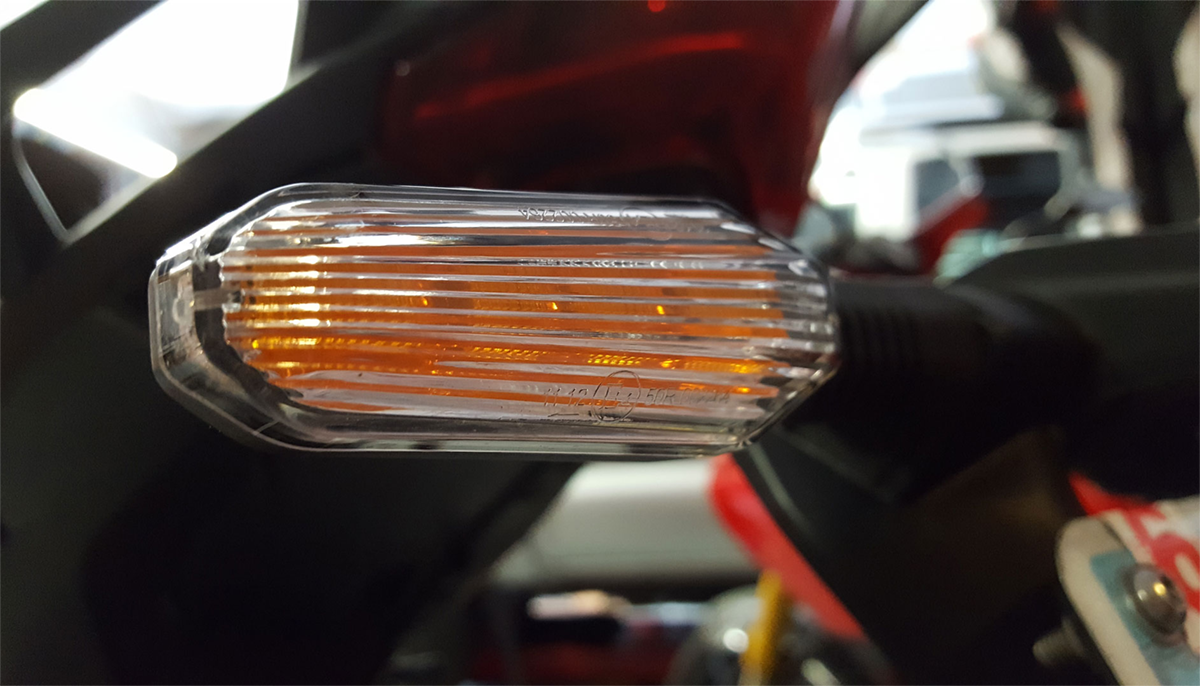
The problem arises when it comes to retrofitting LED signals to a bike that comes with incandescent winkers, the draw from LED is so low compared to traditional bulbs that your bikes flasher unit will think a bulb has burned out and will subsequently blink really quickly. This is not only irritating, but it reduces the effectiveness of the signal.
Two Ways to Skin the Cat
With many older bikes, you can sometimes simply purchase a replacement electronic flasher unit that is designed work with LED signals. The hardest part is making sure you have correct polarity on the new flasher as the original flasher. But on newer bikes with CAN bus, or bikes that may already have LED turn signals on the front (but only incandescent bulbs on the rear), there is a good chance your bike won’t even have a flasher unit. You can try to find a shop that can reflash the bikes ECU, but replacing the rear two turn-signals and adding in two load resistors may be the simplest solution.
However, we do not condone ever skinning a cat, regardless of the method. That’s just mean.
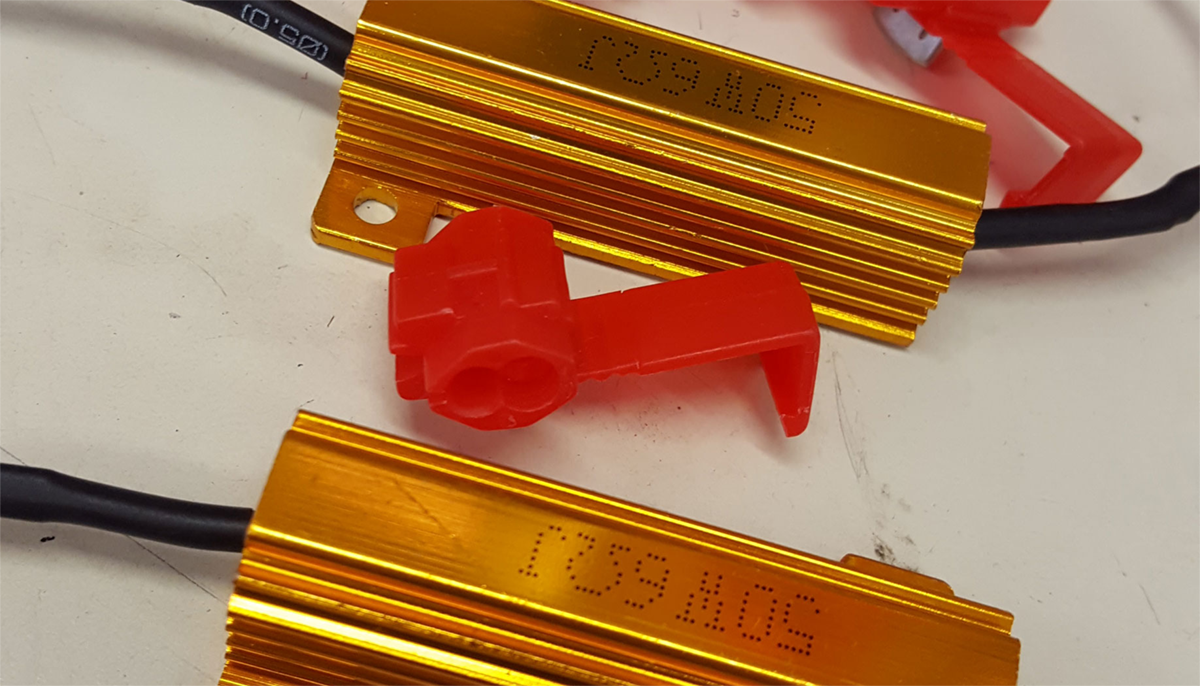
50W 6 Ohm Load Resistors
So, how do we solve the fast-blink problem? In addition to the LED signals, a 50W 6 Ohm Load Resistor needs to be placed in-line with each LED turn signal you are fitting. Don’t worry, these guys come in at a mere $2.50 a pop. However, the Load Resistor is surprisingly large for what it is, so be sure you have a place to put it.
Okay, so you have ordered your LED turn-signals, you have your Load Resistors (That come from China, so they do not come with any kind of instructions). Now what? Well, you’ll get to do some soldering and shrink wrapping. Here’s what’s going to be required.
Shopping List
- LED Turnsignals of Choice
- 50W 6Ohm LED Load Resistors (There are two in this kit, you need one Load Resister for each turn signal)
Tools
Just like everything electrical, there is going to be a positive and a ground wire. When you wire in your new turn-signals it’s critical that you wire the signals correctly. In many cases, the replacement turn signals will sometime use a green lead for ground, while your bike will most likely use a black or a brown wire for ground. On our diagram, we’ve used black for ground, just for clarity, but be sure to verify which wire is ground on your bike before you begin. In most cases, it’s pretty clear but don’t rush through this as it’s kinda’ important to get it right.
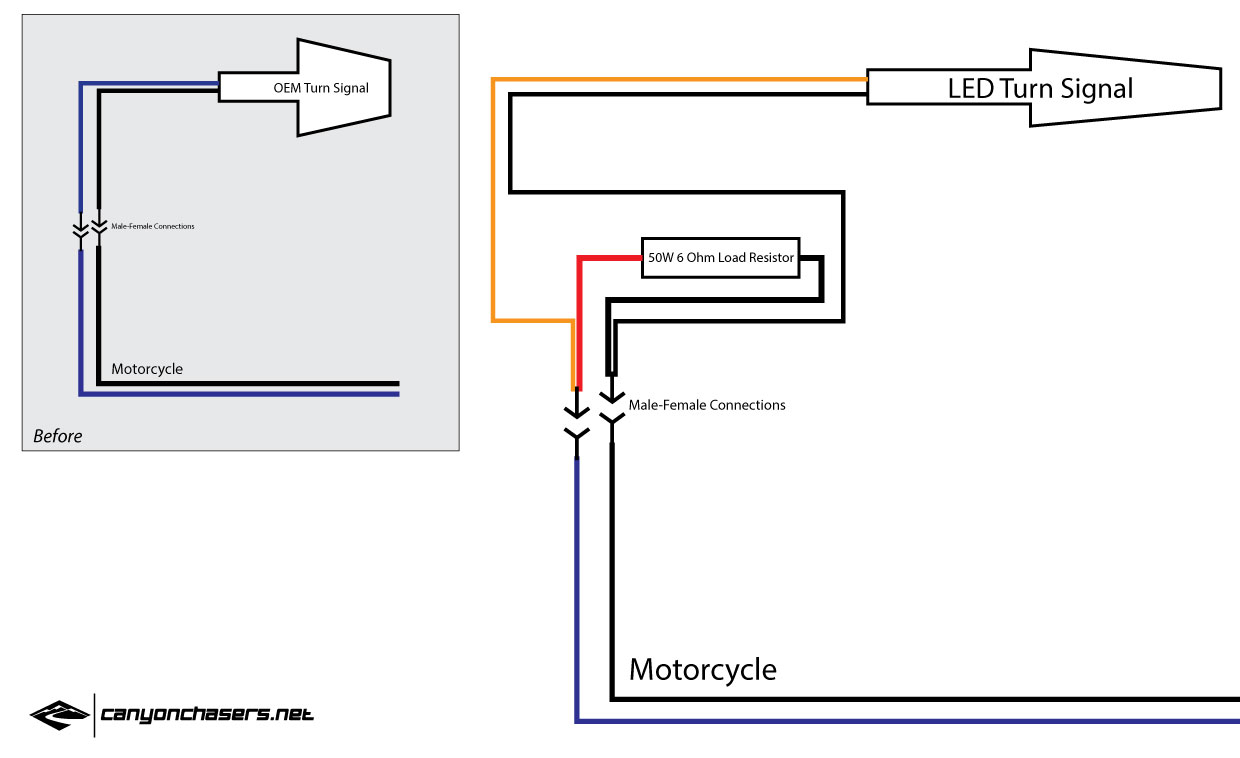
To install the Load Resistor, you have to break every rule of wiring you may know. You have to connect it in between the red and black wire. This is why it’s important that you clarify which wire is the ground on your motorcycle before diving in.
In most cases, it’s going to be easier to install the load resistor in-line with your turn-signal before installing the turn-signal on the bike. The load resistor kit comes with the vampire clips. We recommend just throwing those away and doing the job correctly, with solder and shrink tubing. Motorcycles are subjected to lots of vibration and a lot of moisture. The vampire clips are susceptible to failure from both. Whereas solder and shrink tubing is a much more robust, as well as a more elegant solution.
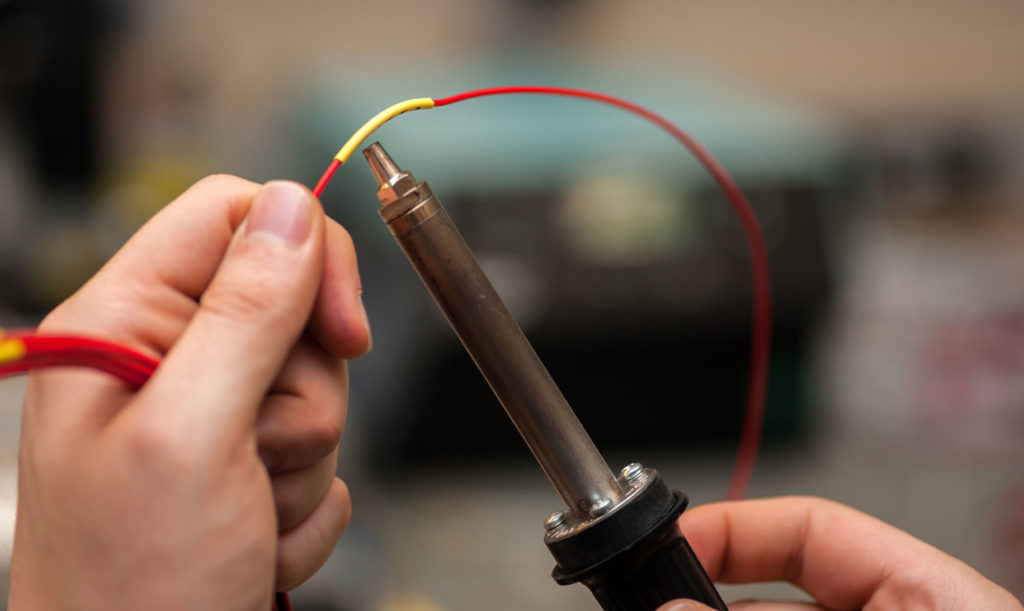
If you have never used shrink-tubing, it’s simple. Slide the appropriate size over the wires, do your soldering, slide the tubing over the solder/connection and then use a heat source, like a lighter, to shrink the tubing, creating a nice seal, protecting the connection from water and from shorting out.

And there you have it. This super simple task will ensure that your brighter, and longer-lasting LED turn-signals will blink at the appropriate rate!