Whenever you change the front end on a motorcycle (typically for higher-grade forks) there is always the problem of what to do about the gauges and a speedometer. With our track-only SV-650 (with alternative Kawasaki ZX636 forks) finding a working gauge for a reasonable price seemed like an impossibility – that is until we discovered Trail Tech.
Trail Tech is a Washington (state) based engineering company that is dedicated to making better products more affordable than the competition. They have made quite the name for themselves with dirt-bike and ATV gauges. Their gauges are so flexible that many a rider has adapted them to street bikes, and because of the popularity of installing Trail Tech gauges onto SV650’s, Trail Tech saw it fit to create an SV650 specific gauge kit! We were delighted to make this discovery.
From initial glance the kit looked almost too good to be true; the speedometer function shows current speed and maximum speed. The Tachometer has a real-time bar graph, a numeric RPM readout, dual programmable shift lights and goes up to 20,000 RPM. The temperature function shows ambient temperature, engine temperature and has dual programmable temperature lights. For distance, you get a tripometer and a permanent odometer, a clock, stopwatch, ride time and an hour meter. What more could you really need, except maybe a lap timer?
Examining the website didn’t give us all the gory details that we wanted, so we fired off an email. Within 15 minutes an email conversation was started with Travis, an actual Trail Tech engineer. He answered all of our questions quickly and then assembled a special SV650 kit with a few extra goodies for us to try out.
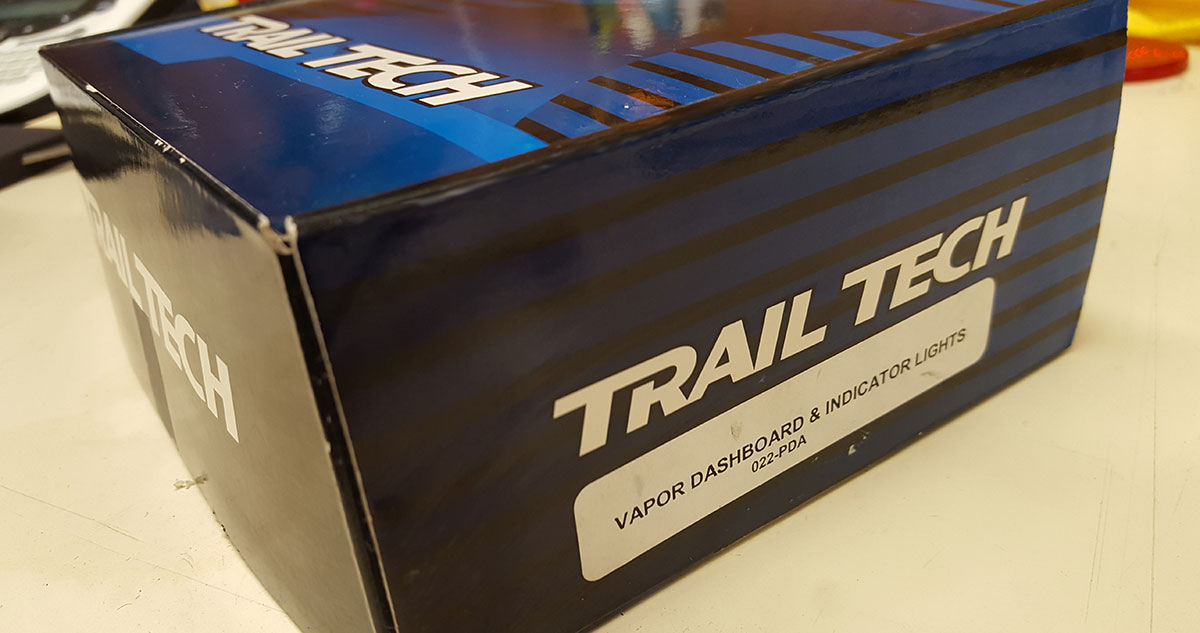
Within a week our box arrived brimming with Trail Tech goodness. We ordered the Trail Tech SV650 Specific Vapor Gauge Kit (Part Number 75-600) $124.95 as well as the Vapor Indicator Dashboard (Part Number 022-PDA) $39.95 that would allow us to plug in idiot lights we so desperately missed – frivolous things really like the oil pressure light to warn us when the engine lost oil pressure. It also allowed us to have a neutral light and a low-fuel light. Because we were using the gauge on a track only bike, we didn’t need to worry about hi-beam or turn-signals, but the kit came with lenses for about all the idiot lights you would need.

The Indicator Dashboard kit also came with a nice mounting bracket. Various versions of dashboards and aluminum protectors are also available, but we really didn’t see the need for our application. Installing the kit was surprisingly easy. Ample sheets of instructions are included and detail every step of the installation, and they feature clear and easy to understand pictures to supplement the text.
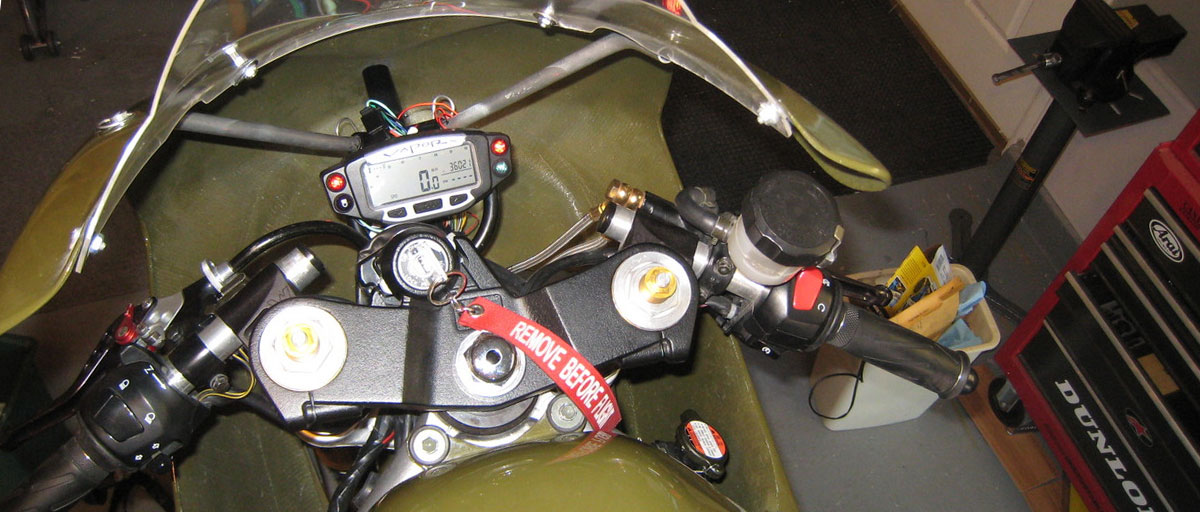
We started by first mounting the gauge. Because of our specific situation on our track-only bike, we were unable to use the mounting bracket in its entirety. We did, however, use the dimensions and vibration damping grommets. We built our own bracket out of a piece of steel angle, cut it to shape, drilled a couple of holes and then sprayed it with a black wrinkle coat.
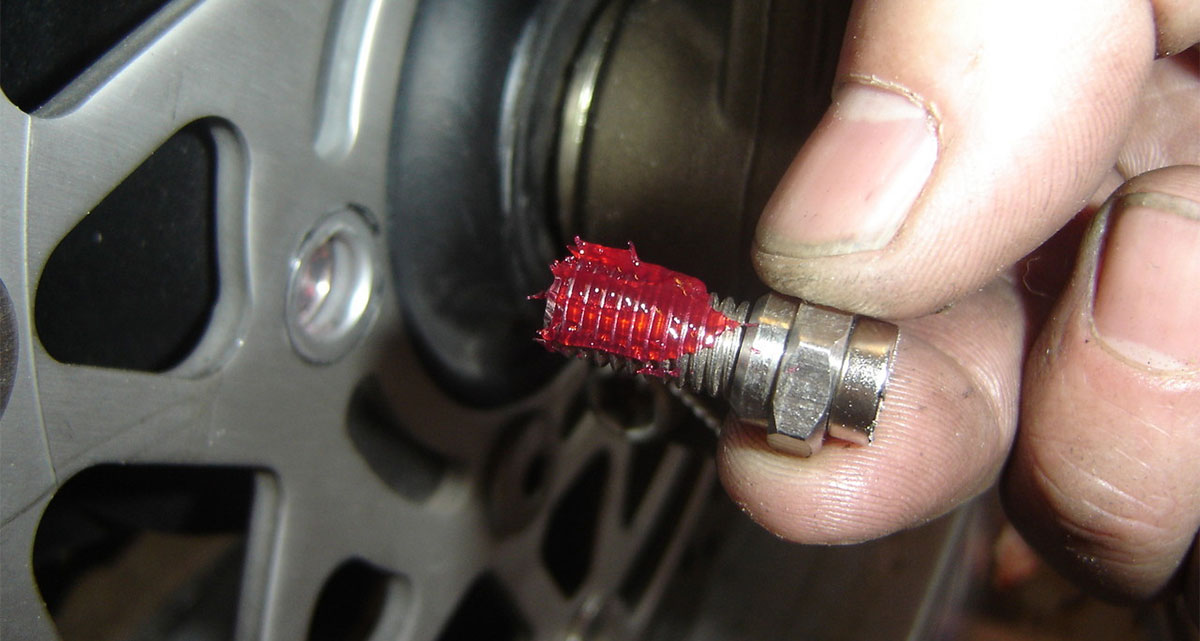
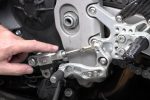
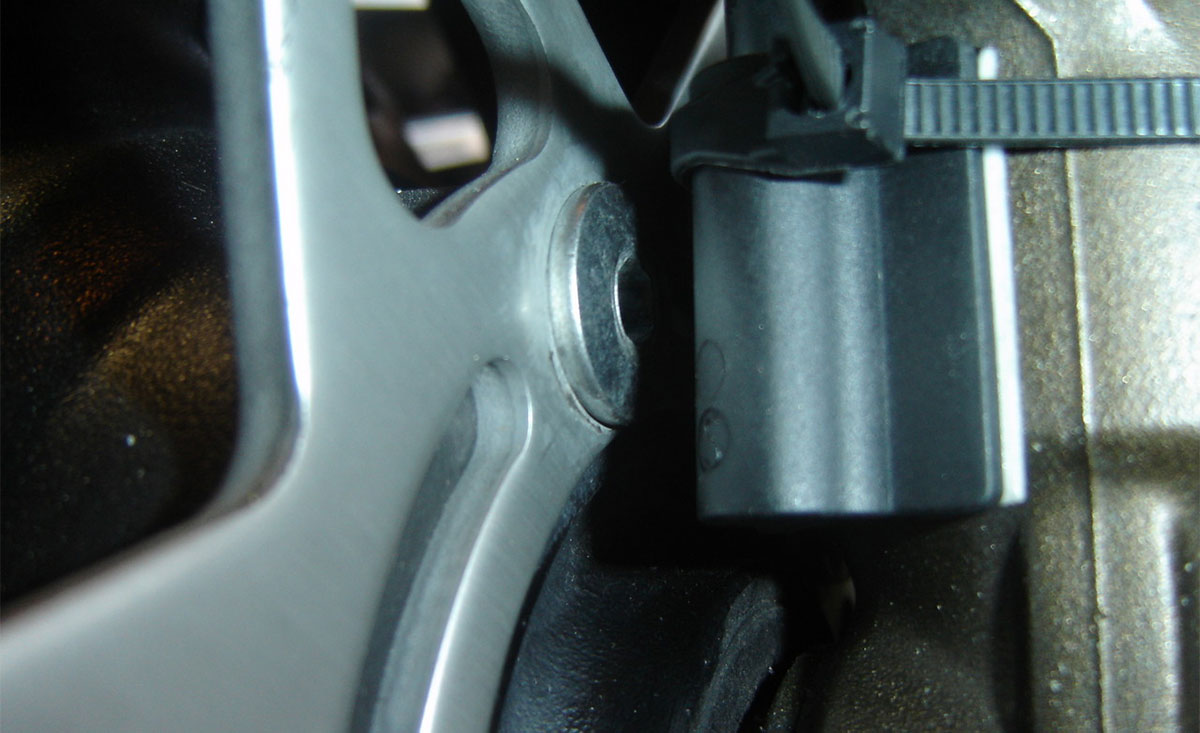
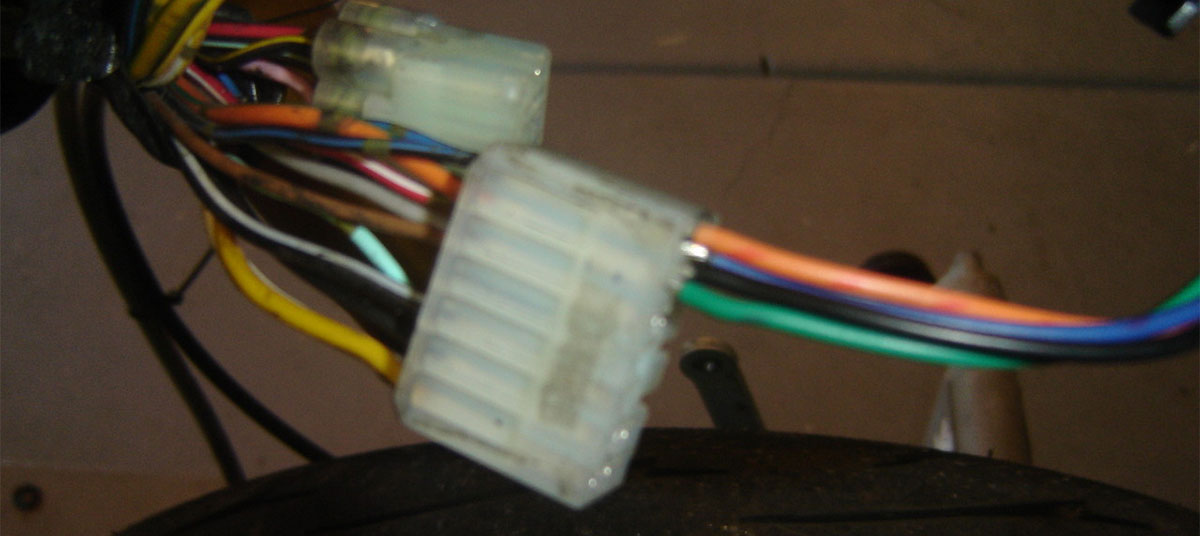
Once the bracket was placed, we started running the wires. In order to get the speedometer to work one of the front (or rear) brake rotor bolts needs to be removed and replaced with the supplied rotor bolt that houses a super-strong rare earth magnet in its head. The speed sensing unit is pre-shaped and slender enough that it fits at the bottom inside of the fork leg, just above the axel. The glue didn’t appear to be strong enough for our tastes, so we doubled up on the affixing by zip-tying the speed sensor in place. So far it has yet to budge – a good sign as this is our biggest concern about the gauge unit. If the speed sensor slips or moves it could get caught in the fast spinning wheel. There is another speed sensor set available that is designed to attach at the rear wheel. This may be a better option since it does not have to work around the forks.
Plugging in all the wires proved to be far simpler than we imagined. Carefully following our bikes specific wiring diagram, we were able to quickly identify all the leads we wanted; oil pressure, neutral and fuel – leaving an extra light blank for now.
We originally planned on cutting and soldering into the wiring loom, but we found on our bike, the plugs were small enough that we were able to heavily solder the Vapor wire leads and jam them into the empty plugs on the bike. The heavy coat of solder made it so they plugged in securely and didn’t come out without some deliberate force, so we don’t expect wires to jiggle loose on their own. This was really nice because we did not have to cut the bikes wiring and it sped up the install process dramatically.
Lastly was plugging in the lead for tachometer – and where we had a problem with our kit. We were missing the special Raptor 7000 Tach Sensor Kit (Part Number 7000-1020) that was supposed to be included in our kit. A quick email to Travis and within another 15 minutes a priority mail envelope was on its way to us. Kudo’s to Trail Tech for their quick response and great customer service. Once the Tach Sensor Kit was in hand (which is basically a different tach lead wire with a resistor inline) all we had to do was attach it to the coil. On our bike we needed to attach it to the white coil wire that plugs into the rear coil. They also have two other alternatives to attach the tachometer so there appears to be great flexibility for different bike applications.
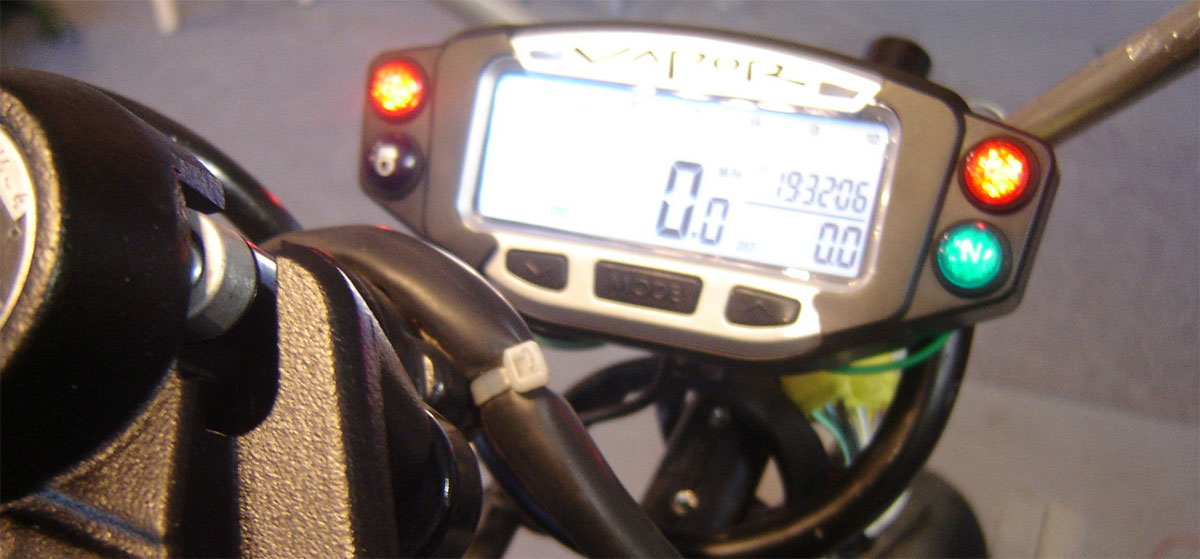
And that was about it. The kit was installed and functional and even had a nice white backlight so the gauge is supremely visible in low light conditions. There is an option for an engine temperature sensor, but the kit asks that we cut the radiator hose and install the inline sensor. We were less than keen to do this mostly because the SV has an existing sensor in the thermostat housing – although none of the thread pitches on the Trail Tech temperature sensors matched the Suzuki temperature sensor. So far this is the biggest flaw to this otherwise great kit. Without the temperature sensor plugged in, the Vapor simply shows ambient temperature.
As far as functionality goes, the Vapor gauge is completely programmable. The wheel needs to be measured for the speedometer to work correctly and you need to set your bikes red-line and where you’d like the two-stage shift lights to illuminate. Very nifty. The gauge operates smoothly with virtually no lag – certainly not enough to cause us any duress. The RPMs seem to read a smidgen low, but again; there are settings inside the Vapor gauge that allow you to compensate for this if needed. We are leaving ours alone for now because for our application we feel its more important to have a reference to engine speed more than know the exact rpm speed.
Overall we are supremely impressed with this gauge set. For $165.00 we got a fully functional gauge cluster that does all we needed and wanted it to do – in fact, it does more than most factory gauges that come on bikes from Japan and Europe.
Here are the install instructions as posted on SVRider Forum as well as some links to videos and whatnot. For more information or to see if gauge kit for your motorcycle, swing on over to the official Trail Tech website.